

Hi! Bev here with a print and cut tutorial for these useful monthly planner tabs. A very quick and simple project that I have used for my creative journal.
What you will need:
- Silhouette Cameo® or Silhouette Portrait®
- Silhouette White Sticker Paper
- Printer
Open up a page in your Silhouette Studio and set the page settings to Letter and apply registration marks. Import the file from your library and resize as required. I am not a fan of wasting paper (especially when it is as nice as this sticker paper!) so I replicated it and cut two on one sheet.


Usine the elipse tool, draw a box around each set of tabs. Change the colour of the box outline so the Silhouette can recognise it in the cut settings to enable you to perform two different cut types, kiss cut and outline. You can see this technique here.
Send your file to the printer and place on your Silhouette mat and feed into your machine.


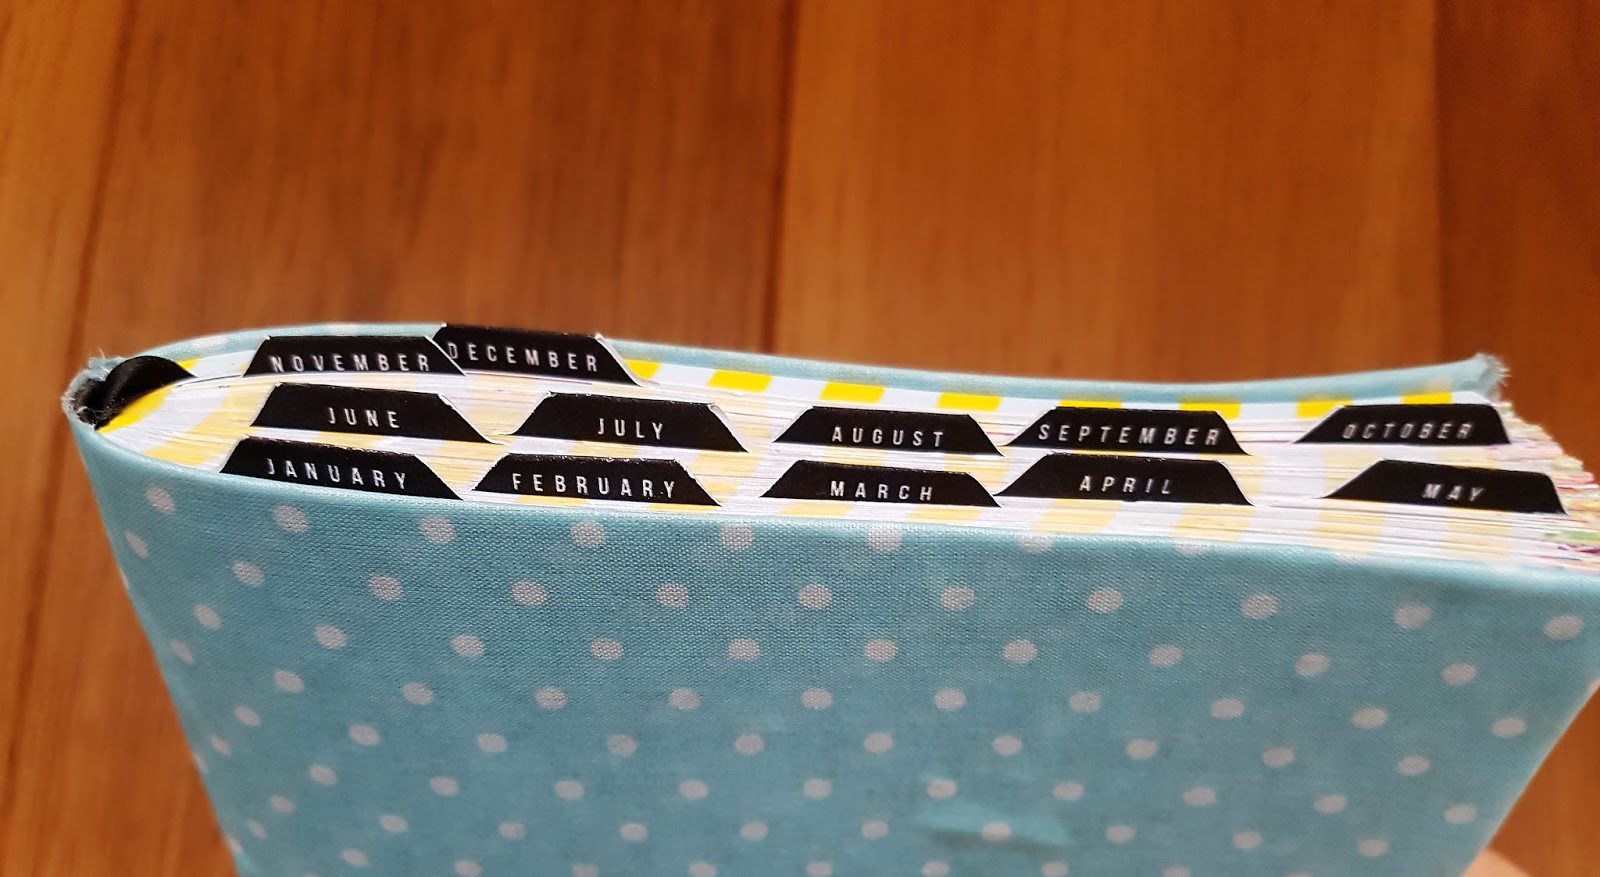
Once cut, you can peel off the backing sheet and stick into your notebook, diary or planner.
Such a simple project and very quick to do.


I have really enjoyed sharing with you and can't wait to see what you create!

Designs Used
Planner Tabs 12 Months by Felicity Jane - Design ID #99870
Products Used
 |  |  |  |  |  |
No comments:
Post a Comment